Raspberry Pi Setup
To be performed for each robot component (two anchors and one gripper) If you purchased a fully assembled robot you do not need to do this.
For pre-imaged cards
When the component boots it will look for wifi credentials using it's camera. Hold up a wifi share QR code to it and it should appear on your network and be detected by the control panel in under a minute.
You can generate a valid wifi share code with qifi.org
Image SD card
Download the Raspiberry Pi Imager
Insert a MicroSD card and open the imager. The image reqiured depends on the type of Pi. Currently anchors are designed for the Pi 3A+ and the the gripper uses a Zero2W.
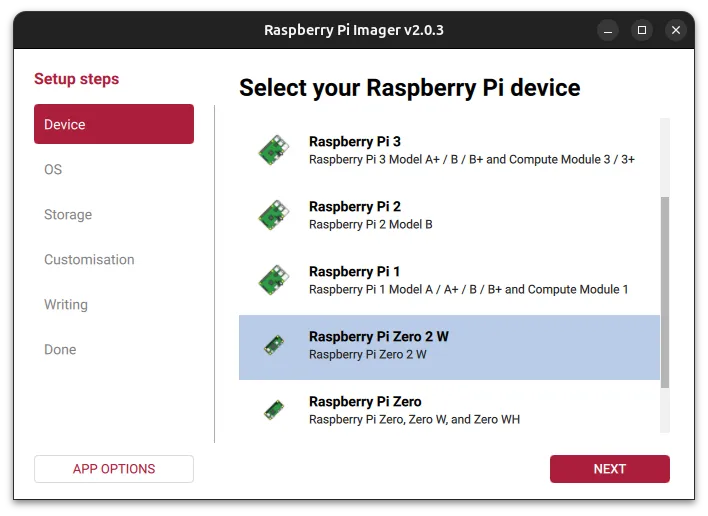
For device, select Raspberry Pi Zero 2 W
Download the Stringman Raspberry Pi Image (1.6 GB)
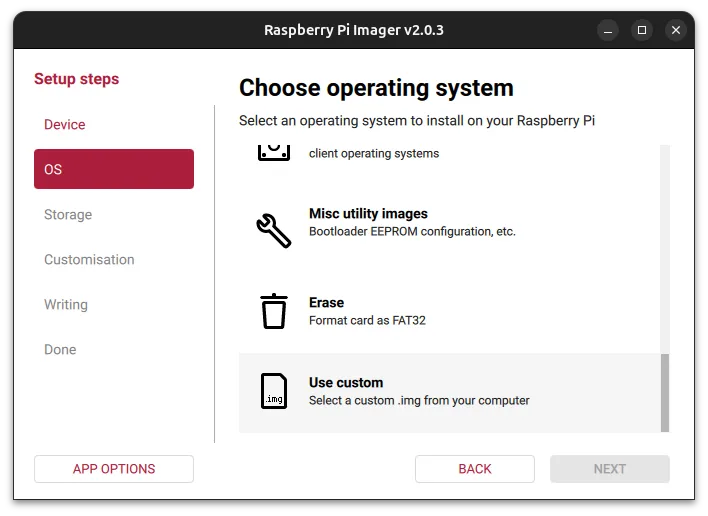
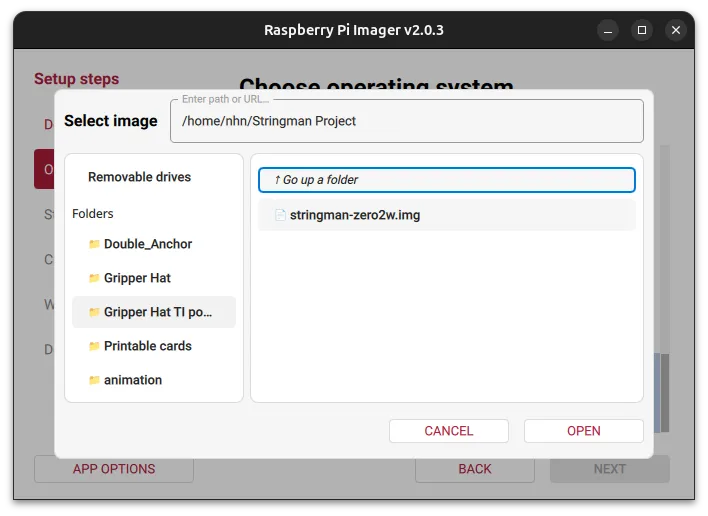
For operating system, select custom image and use the downloaded file.
For device, select Raspberry Pi 3A+
Download the Stringman Raspberry Pi Image (1.6 GB)
For operating system, select custom image and use the downloaded file.
Click Next and then select the SD card you would like to flash.
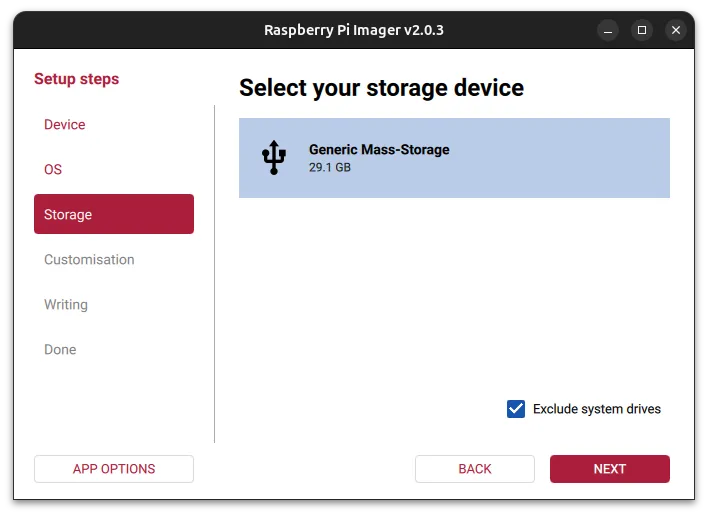
Click Write and confirm. When the image is finished, insert it into the raspberry pi of the stringman component and boot.
Configure the wifi with a share code according to the structions in the section above.
Eval tools and component types
The final step in assembly of either a gripper or anchor is to run a self test script. This interactively prompts you to plug in one motor at a time so that their IDs can be set properly.
The same image is used for both anchors and gripper. After assembly you will have to run the corrsponding self test, and it leaves a file that is used to run the correct behaviors next time the service starts.
ssh into the component, stop the service, and perform an update before starting the self test
sudo systemctl stop cranebot.service
/opt/robot/env/bin/pip install --upgrade "nf_robot[pi]"
/opt/robot/env/bin/qa-anchor-arp
Follow the prompts to set up the anchor. Be prepared for fast motion when winding the spool. Do not hold the supply spool tightly.
/opt/robot/env/bin/qa-gripper-arp
Follow the prompts to set up the gripper.
If during the finger contact test it never detects pressure, you may have to slightly adjust the potentiometer on the board until the finger contact test works.
The video test at the end can either be completed normally by opening the stream on a host machine with the printed command or by killing it with ctrl-c
Updates
During normal use updating the code on the robot components is done using the the "Update firmware on components" action in the maintenence menu.
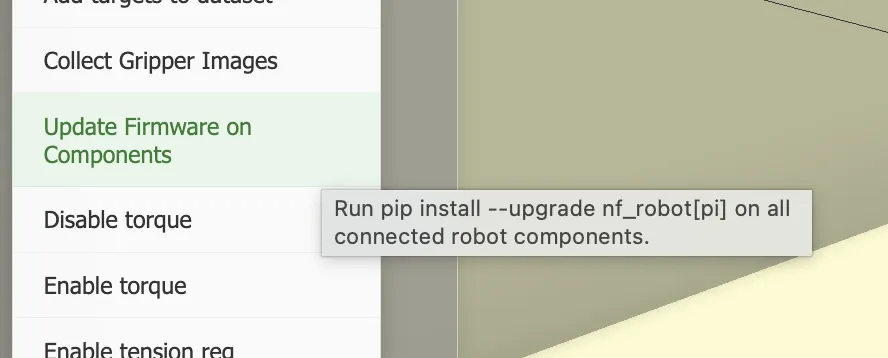
If any update fails, you may need to run it manually to get unstuck. The update process shows the IP's of any components that did not update. ssh into them.
ssh pi@<component-address>
the password on the default stringman image is Fo0bar!!
Then run the update with
/opt/robot/env/bin/pip install --upgrade "nf_robot[pi]"
Updates that require reflashing the SD card
In some cases, there are updates that cannot be installed via pip. For these cases it may be necessary to re-image the SD card. Since doing this would wipe out certain configuration files, back them up first
scp username@<raspberry_pi_ip>:"/opt/robot/{server.conf,arp_gripper_state.json}" .
Then power down the component and pull the SD card. Image it using the instructions in the "Image SD Card" section above, then re-install it and power up the pi.
Copy the files back up
scp server.conf arp_gripper_state.json username@<raspberry_pi_ip>:/opt/robot/
Setting a different wifi network
At boot if none of the saved wifi networks can be connected to, the device will go into QR code checking mode with it's camera. Just hold up a new code
If that doesn't work in your scenario, insert the Micro SD card from a robot component in your PC. Confirm it is mounted at /media/$USER/rootfs run the following command from the cranebot3-firmware repo
sudo ./add_wifi_config.sh "SSID" "password"
Locking down the pi's
By default the password for th pi user on the Stringman image is Fo0bar!! which makes it easy to troubleshoot new devices.
For greater security you can disable password authentication and change all three components to accept only private key authentication
Automated method
from cranebot3-firmware with venv active
python experiments/deploy_ssh_keys.py mr_robot.conf
Supply the configuration file for a robot you want to deploy keys to. Components password auth with only be disabled after verifying your key auth works so it won't lock you out.
Alternatively, here's the manual methods.
Change the password
ssh into the component and run
passwd
Enter the current password (Fo0bar!!) once, then your new password twice.
Set up key-based authentication
If you don't already have an SSH key pair, generate one on your own computer
ssh-keygen -t ed25519
Copy your public key to the component so it will recognize you without a password
ssh-copy-id pi@<component-address>
Confirm you can log in without being prompted for a password before continuing
ssh pi@<component-address>
Disable password authentication
Once key authentication works, ssh into the component and edit the ssh server config
sudo nano /etc/ssh/sshd_config
Set the following options
PasswordAuthentication no
ChallengeResponseAuthentication no
Save, then restart the ssh service to apply
sudo systemctl restart ssh
Repeat for each component. From now on these devices will only accept logins from machines holding your private key.